If you need to perform Office backup files to PST process then you are at the right place. In this blog, we will explain to you the easiest method to Office 365 backup files to PST format.
There are some queries on internet related to moving PST file from Office 365 admin center, backup Office 365 emails to PST from the portal, how to save emails from Office 365 to PST from the admin center. Before going continue, let’s take a look at PST file format.
About PST File
PST mainly stands for Personal Storage Table used to keep email messages, contacts, calendars, tasks, and events, and other personal data used by MS Outlook email application. This PST file format is generated by Microsoft for Outlook email client.
Techniques to Backup Office 365 to PST Format
There are three methods to Office 365 backup files to PST format. We will describe all the methods to backup Office 365 to PST format. Below are the three ways that we explain in this blog.
Method 1. From Admin Center/Web Portal
Method 2. With the use of Outlook application
Method 3. Using third-party Tool – Office 365 Backup
Backup Office 365 Emails to PST from Admin Center
- Login to Office 365 account.
- Press on the gear icon and hit on the “View all Outlook settings”.
- Now go to General > Privacy and Data.
- Click on “Export Mailbox” as seen on the screenshot.
- Now the export process has on-going and it will take up to 4 days to perform the process.
- When the process is completed, you will get the email with PST download link.
Drawback: The main drawback of the above process is that it will not save Office 365 mailbox to PST file quickly. You need to wait up to 3-4 days liable on your mailbox size.
Office 365 Backup to PST using Outlook Application
To Office 365 backup files to PST file format using Outlook application, first, you need to download and install Microsoft Outlook app on your system. After successful installation of Outlook, you need to follow the below-given steps:
- Open Outlook application on your machine.
- Add your Office 365 account into MS Outlook email app and wait for a while.
- Once Synchronization will finish, select the file at top of your MS Outlook Ribbon.
- Select Open and export, then select Import/Export.
- Now, from Import and Export Wizard, select Export to a File.
- In the next tab, click on Outlook Data File (.pst), and then press on Next.
- Now choose email account that you wish to move into a PST file format.
- After that hit on the Browse and choose a folder where you need to export your PST file from Microsoft Outlook.
- Hit on the Finish button.
By following these steps, you can successfully Office 365 backup files to PST. But there are a few drawbacks of this method which are provided below:
Drawbacks:
While achieving export process using Outlook email application you can move only Inbox emails, as MS Outlook does not sync Outbox, Sent Mails, Draft Mails, and other folders. If you need to move only Inbox emails and contacts then this above-mentioned method will be a great option for you. If you want to backup all folders along with with sent mails, draft mails, etc. then you can go with the next method.
Export Office 365 to PST using Office 365 Backup Software
For this method, first of all, you need to download and install Office 365 Backup Tool. This software has the capability to save Office 365 emails to PST format without losing a single bit of details. Now follow the steps to quickly Office 365 backup files to PST file format:

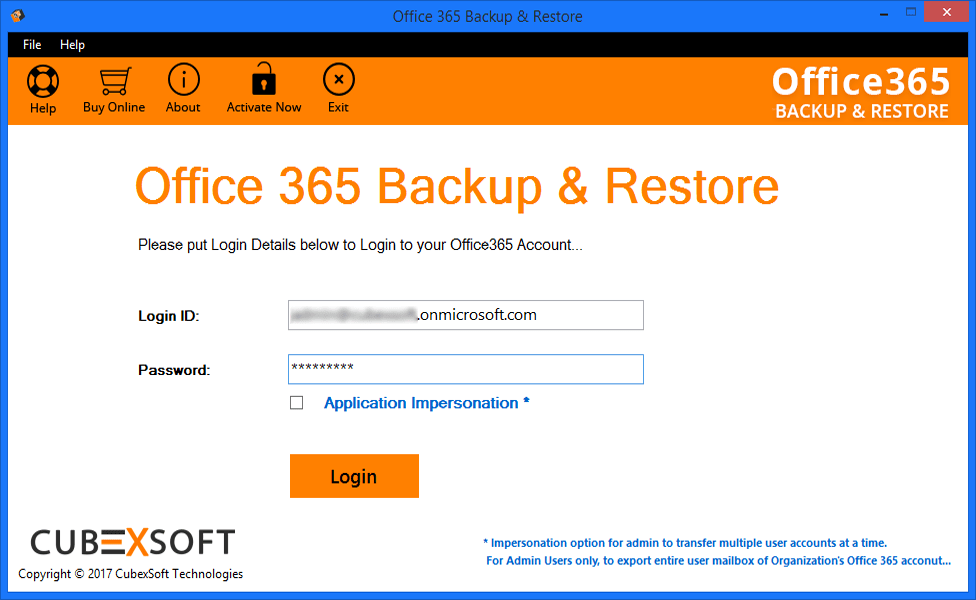
Step 1. Launch the tool and fill the Office 365 admin login details, and then click on the Login.
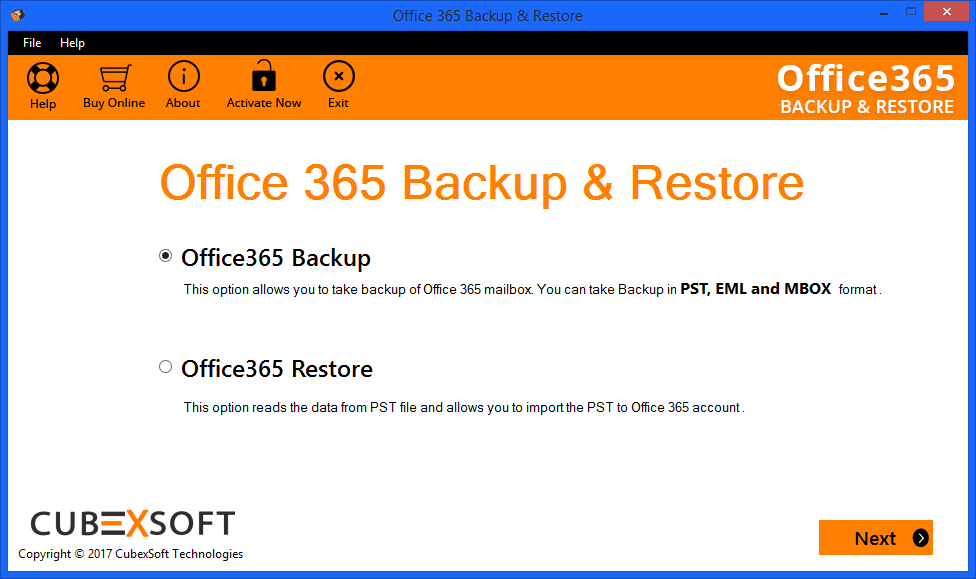
Step 2. Now choose Office 365 Backup from Office 365 Backup & Restore option and then hit on Next.
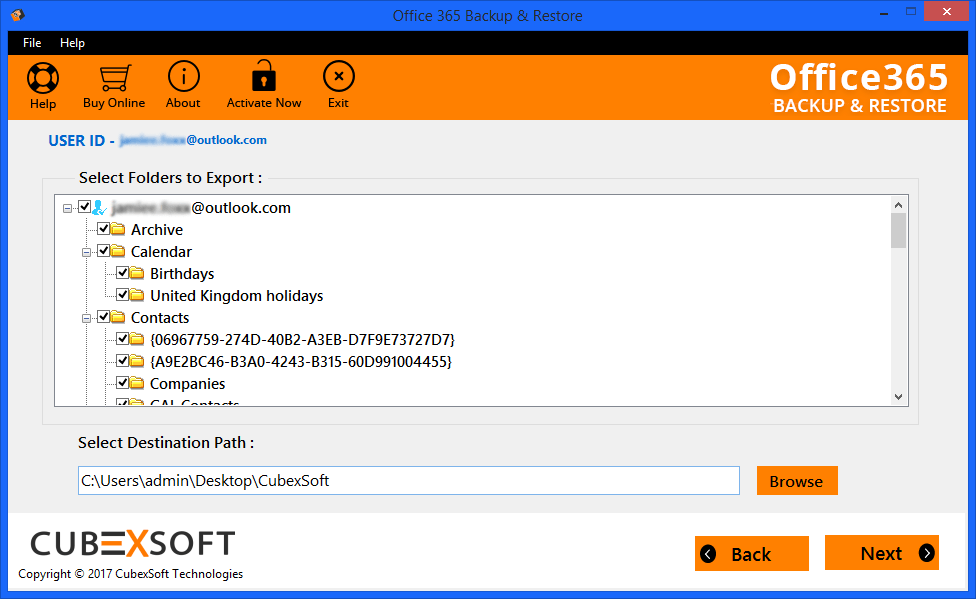
Step 3. Now you can see the complete list of Office 365 mailboxes, so you can choose the mailbox which you want to backup as PST file. After that hit on the Browse to choose saving location where you want to save resultant files and click on Next to proceed further.
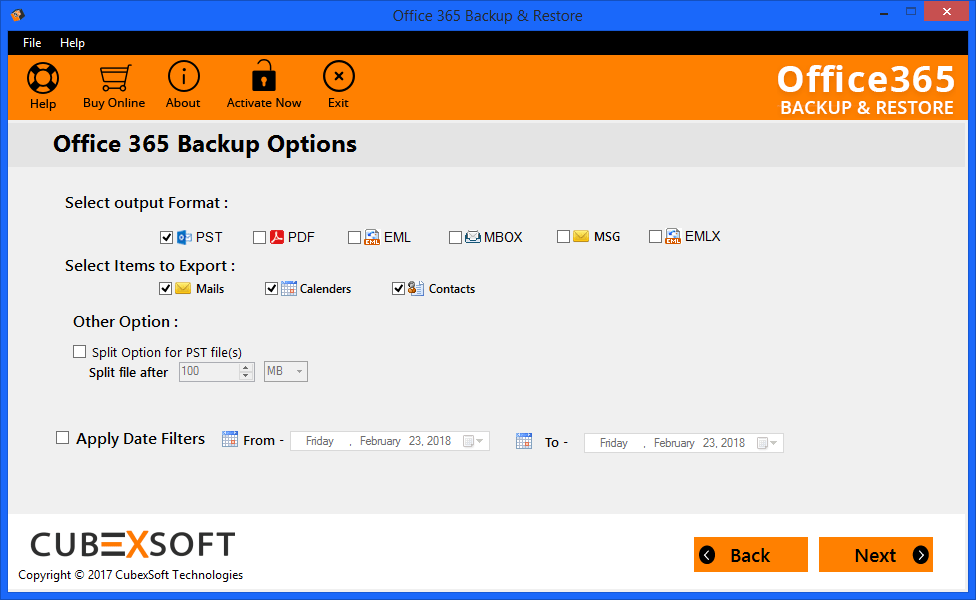
Step 4. Select Output format as PST to Office 365 backup files to PST and also choose Items which you want to export like Mails, Contacts, and, Calendars. Then, press on the Next to start the process.
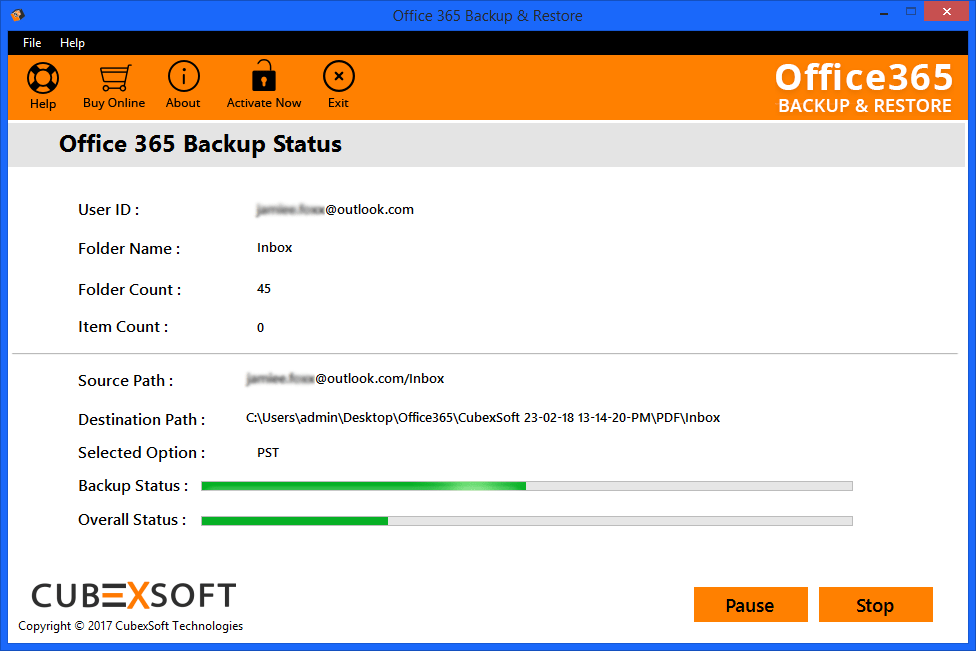
Step 5. Now you can view the live backup process from Office 365 to PST with the green progress bar and Folder Name.
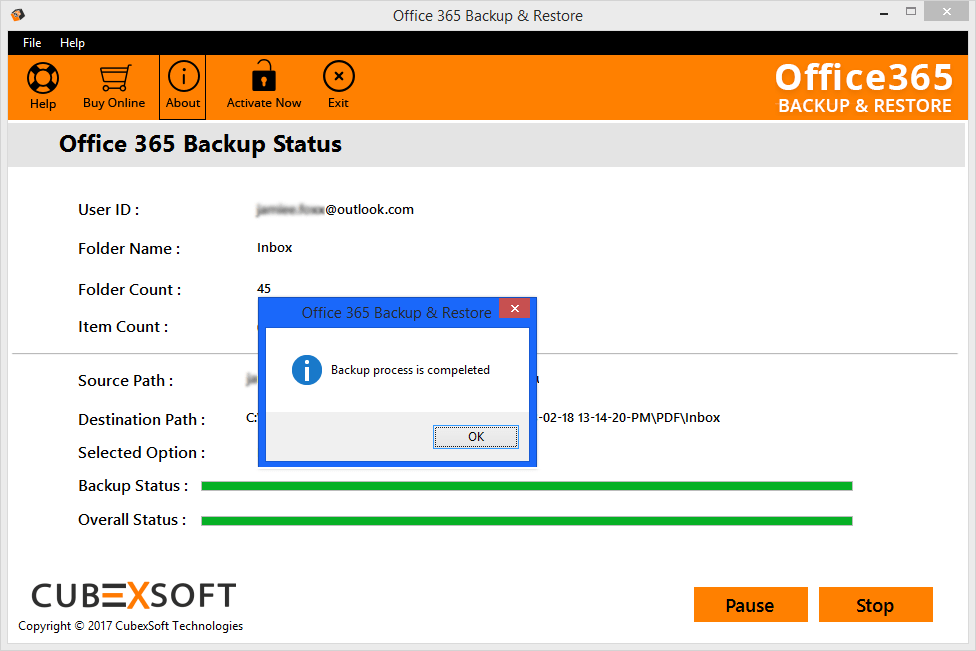
Step 7. Once the process is done, a message will immediately like the Backup process is completed. Then, click on OK to finish the process.
The Final Words
Here in this blog, I have explained three different methods to perform Office 365 to PST backup process. First two methods are manual methods there have some drawbacks. And the last method is a professional method or an automated solution that gives 100% success result without any difficulty or error. One can choose any method amongst the above-explained methods. But I would like to suggest to use third-party tool – Office 365 Backup that also available as Demo Version, which is able to back up a few emails from Office 365 to PST format without any cost.

 I am looking for the conversion of MSG files into PST file format so that I can manage all my mail files in an unproblematic way but I do not know how do I save MSG files as PST file. Is there any method through which this conversion process can be done?